If you run a creative small business or regularly trade at Brighton markets, having a unique and eye-catching display sign can make a huge difference. A custom die-cut sign helps your market stall stand out, attracts customers from a distance, and reflects your brand personality.
In this guide, we’ll walk you through exactly how we designed and made our die-cut sign using Procreate and a Cricut machine—an easy project that instantly leveled up our Brighton market display.
Why Display Signs Matter for Creative Small Businesses
When you’re selling at an art market, craft fair, or pop-up, your stall is your shopfront. A bold, well-designed sign helps:
-
Show your brand style right away
-
Make your table look more professional
-
Catch the eye of people walking through busy Brighton market spaces
-
Create consistency across your products and packaging
Even a small sign can make your stall look more cohesive and inviting.
Our Step-by-Step Process: Making a Die-Cut Sign for Our Brighton Market Stall
1. Designing the artwork in Procreate
We started by creating our illustration in Procreate, just as we would for a print or sticker. This gave us full control over colours, textures, and layout.
2. Exporting a high-res PNG
Once the artwork was ready, we exported it as a high-resolution PNG with a transparent background—essential for clean edges.
3. Creating the offset outline in Cricut Design Space
In Cricut Design Space, we added an offset around the artwork. This instantly gave it that bold die-cut look often used for stickers and signage.
4. Setting it as a Print Then Cut file
This step ensures the Cricut reads the cut lines perfectly and trims the design with precision.
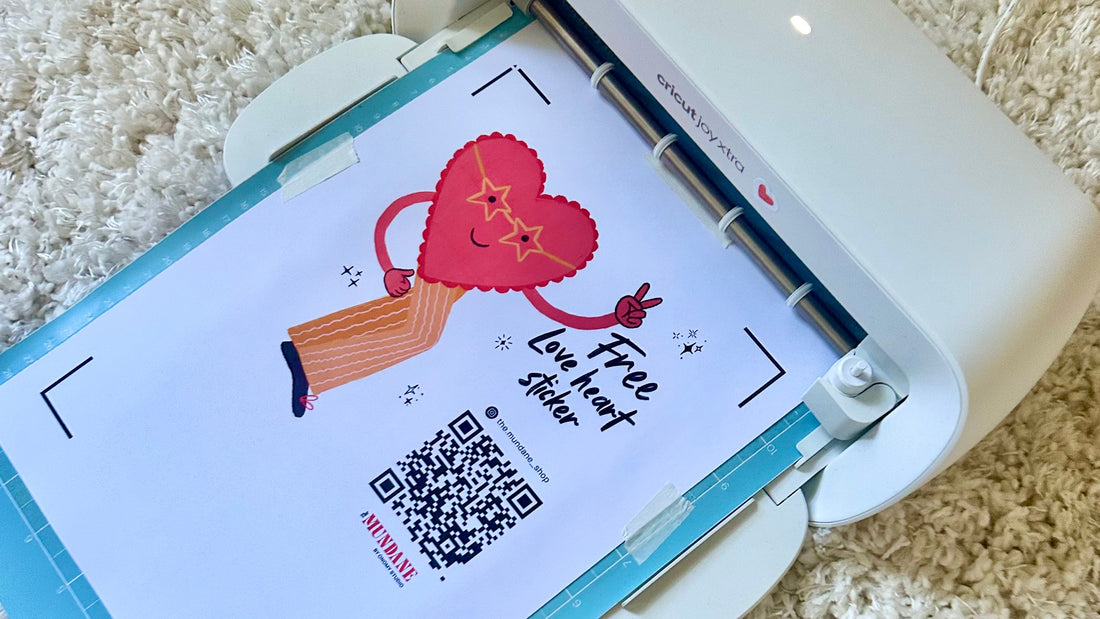
5. Printing onto sticker paper
We used our inkjet printer and high-quality sticker paper to get vibrant, crisp colours.
6. Mounting the sheet on a sticky mat
The sticky StandardGrip Cricut mat kept everything secure during cutting.
7. Cutting the design on the Cricut machine
Once loaded, the Cricut cut beautifully around the custom shape—so satisfying to watch!
8. Display time!
We peeled off the finished piece, slightly bent the base so it could stand on the table, and popped it onto our market stall. Instant upgrade.
The Result: A More Professional & Eye-Catching Brighton Market Stall
Our custom die-cut sign made our booth feel:
-
More inviting
-
More professional
-
More on-brand
-
Much easier for returning customers to spot
If you’re preparing for a Brighton art market, craft fair, Etsy market, or any creative pop-up, this is such a quick, budget-friendly way to elevate your setup.


 Dog’s
Dog’s
 Charm Earrings
 HOT HOT Chilli
 Pasta
Pasta